Introduction
Welcome back, DevOps enthusiasts and learners! Congratulations on navigating through ConfigMaps and Secrets in Kubernetes yesterday.
Today, we're diving into the realm of Persistent Volumes (PV) in Kubernetes. Let's harness this power and enhance our deployment capabilities.
Understanding Persistent Volumes in Kubernetes
Before we embark on today's tasks, let's ensure we're on the same page regarding Persistent Volumes (PVs) and Persistent Volume Claims (PVCs) in Kubernetes.
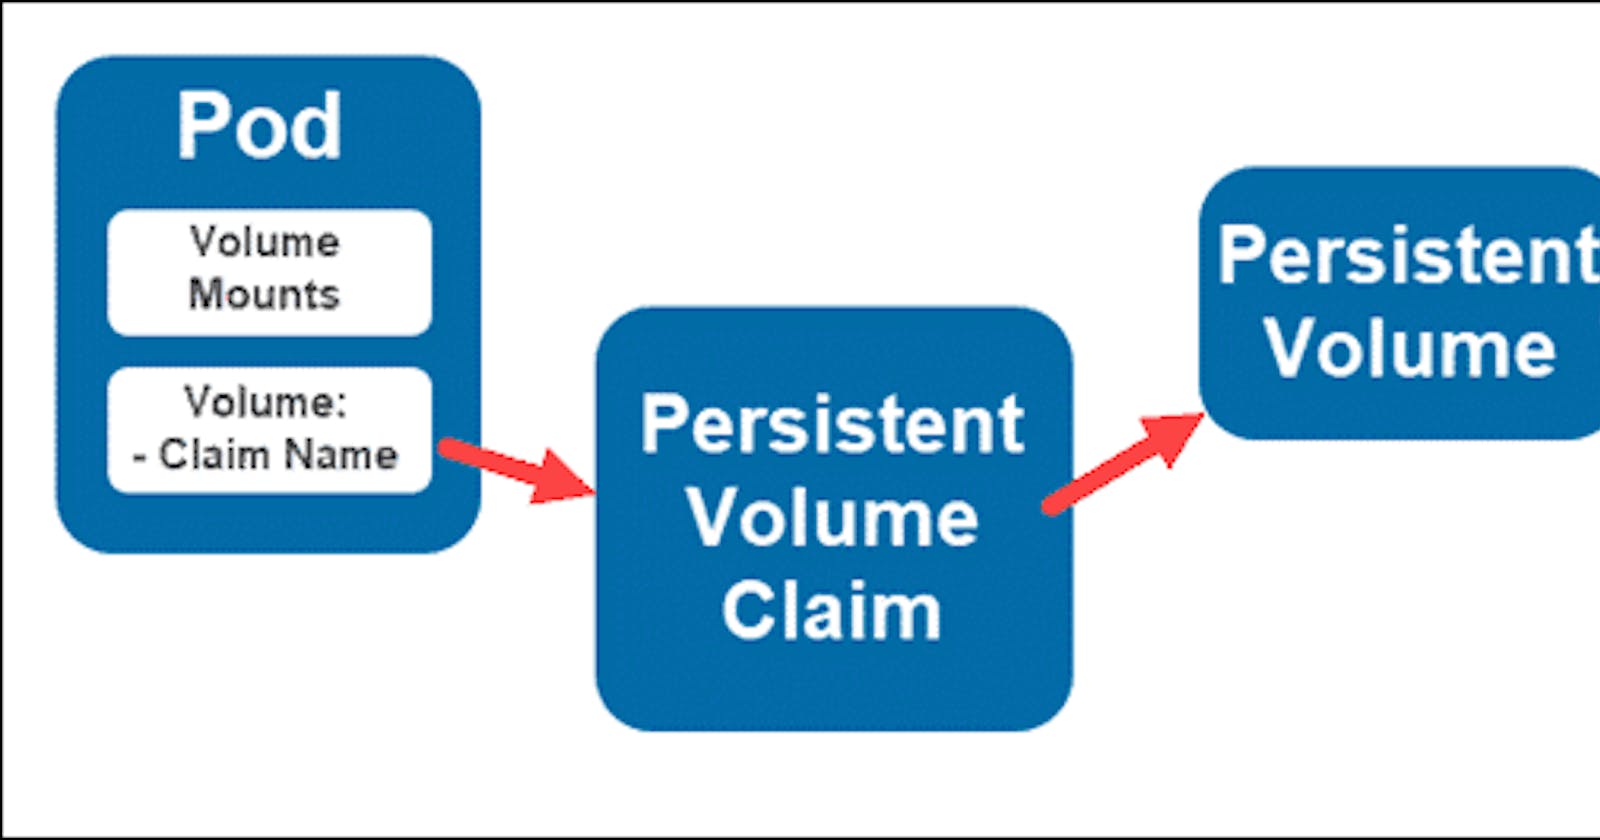
Persistent Volume (PV): A PV is essentially a piece of storage in the Kubernetes cluster that has been provisioned by an administrator. It's akin to a virtual disk, abstracted from the underlying storage implementation.
Persistent Volume Claim (PVC): On the other hand, a PVC is a request for storage by a user or a pod. It acts as a binding between the application's storage requirements and the actual PV.
When a PVC is created, it references a specific PV, which then becomes bound to a node. This binding ensures that the PV is exclusively available to the PVC.
Today's Tasks:
Task 1: Adding a Persistent Volume to Your Deployment Todo App
Let's start by adding a Persistent Volume to our Deployment Todo App. Here's a step-by-step guide:
Create a Persistent Volume (PV): Begin by creating a Persistent Volume using a file on your node. You can utilize the provided template for guidance.
Create a Persistent Volume Claim (PVC): Once the PV is set up, create a PVC that references the PV. This establishes the connection between your application and the storage.
Update Deployment Configuration: Update your deployment.yml file to include the Persistent Volume Claim. This ensures that your application pods have access to the desired storage.
Apply Changes: Apply the updated deployment using the command
kubectl apply -f deployment.yml.Verification: Verify that the Persistent Volume has been successfully added to your Deployment by checking the status of the Pods and Persistent Volumes in your cluster.
Remember, each file must be applied separately when making changes or creating files in your Kubernetes deployments.
Task 2: Accessing Data in the Persistent Volume
Now that the Persistent Volume is integrated into your Deployment, let's ensure you can access the stored data:
Connect to a Pod: Use the command
kubectl exec -it <pod-name> -- /bin/bashto connect to a pod within your Deployment.Data Access Verification: Once inside the Pod, verify that you can access the data stored in the Persistent Volume. This ensures that your application can effectively utilize the provisioned storage.
For additional assistance with Persistent Volumes, feel free to refer to the provided video resource.
Solution
Task 1: Adding a Persistent Volume to Your Deployment Todo App
1. Create a Persistent Volume (pv.yml):
apiVersion: v1
kind: PersistentVolume
metadata:
  name: my-pv
spec:
  capacity:
    storage: 1Gi
  accessModes:
    - ReadWriteOnce
  hostPath:
    path: /path/to/your/directory
2. Create a Persistent Volume Claim (pvc.yml):
apiVersion: v1
kind: PersistentVolumeClaim
metadata:
  name: my-pvc
spec:
  accessModes:
    - ReadWriteOnce
  resources:
    requests:
      storage: 1Gi
3. Update Deployment Configuration (deployment.yml):
apiVersion: apps/v1
kind: Deployment
metadata:
  name: my-deployment
spec:
  replicas: 3
  selector:
    matchLabels:
      app: my-app
  template:
    metadata:
      labels:
        app: my-app
    spec:
      containers:
        - name: my-container
          image: my-image
          volumeMounts:
            - mountPath: "/app/data"
              name: my-volume
      volumes:
        - name: my-volume
          persistentVolumeClaim:
            claimName: my-pvc
Task 2: Accessing Data in the Persistent Volume
1. Connect to a Pod:
kubectl exec -it <pod-name> -- /bin/bash
Replace <pod-name> with the name of the pod you want to connect to.
Conclusion
With the addition of Persistent Volumes to your Kubernetes Deployment, you've enhanced the resilience and storage capabilities of your application. Keep up the excellent work, and remember, we're here to support each other on this DevOps journey.
Happy Learning! 🚀🔒
Don't forget to share your feedback on the #90daysofDevOps challenge to help us improve and provide the best experience possible. Your participation and support are invaluable as we continue to grow together. Let's conquer new horizons! 🌟🙏
Keep your face always toward the sunshine, and shadows will fall behind you.
Happy Learning.

